Description
To the point
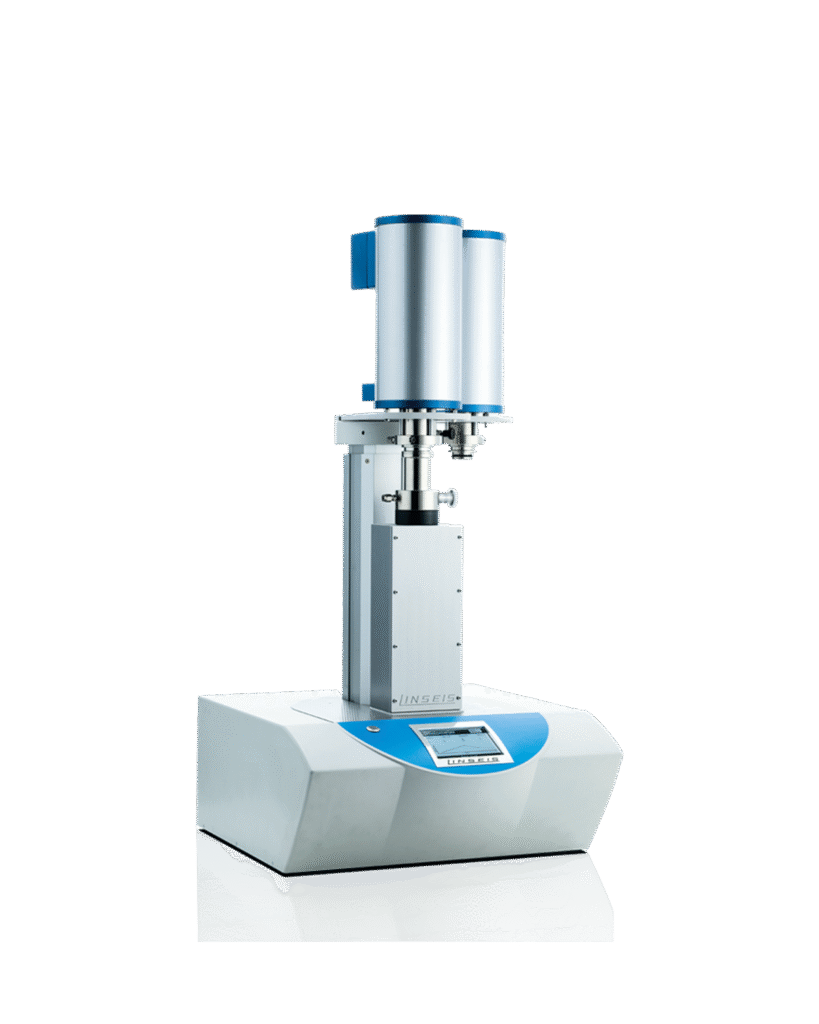
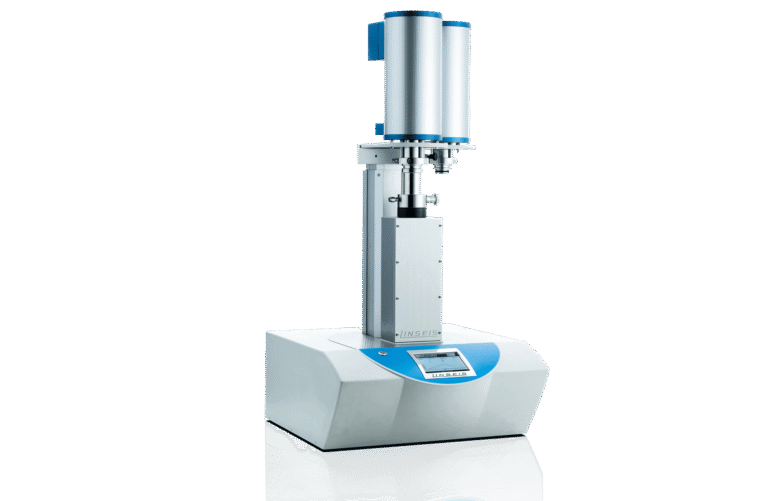
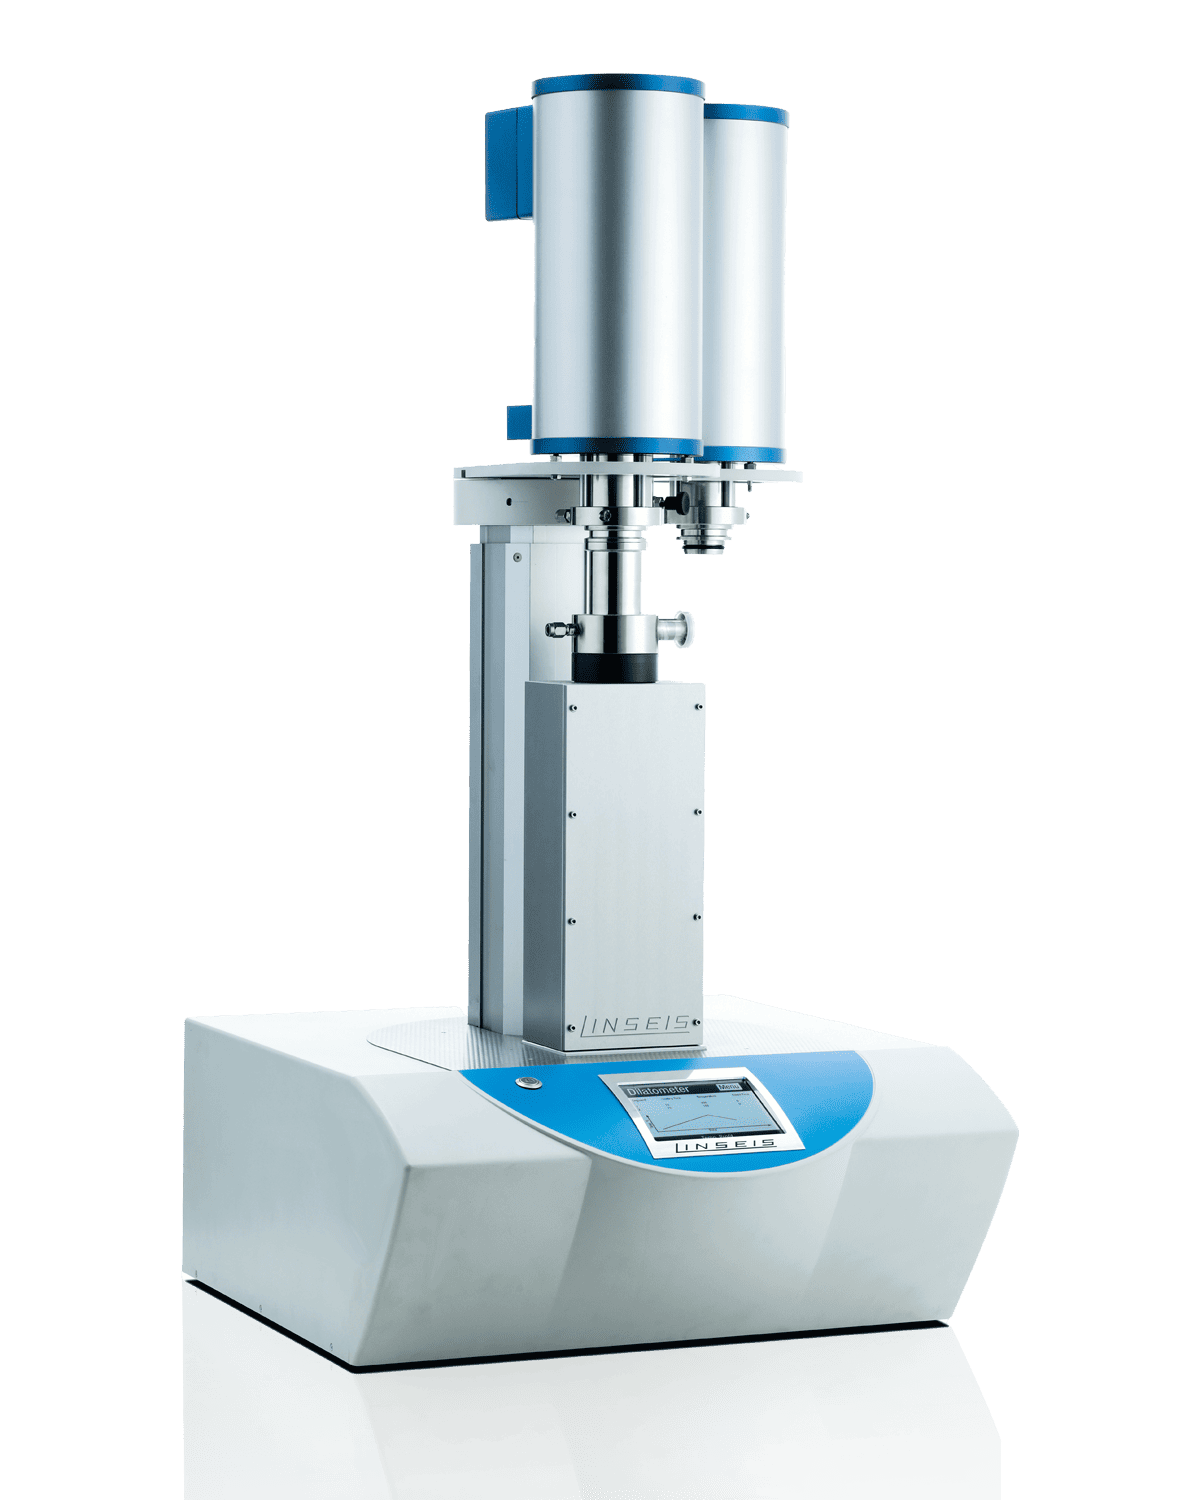
The Linseis DIL L75 Vertical is a high-precision dilatometer for measuring thermal length changes in solids, powders, pastes and liquids.
Its frictionless “zero friction” design enables particularly accurate results with materials with very low expansion and is ideal for sintering studies.
The device works with high-resolution inductive displacement transducers that guarantee maximum accuracy, reproducibility and long-term stability.
Thanks to full thermostatization and automatic pressure control, the contact pressure can be precisely controlled and kept constant depending on the application.
The optional Cryo extension allows measurements from -263 °C to +220 °C under vacuum or controlled atmospheres and offers maximum flexibility and precision.
The following physical properties can be measured:
- CTE
- Linear thermal expansion
- Sintering temperature
- Phase transformations
- Softening points
- Decomposition temperatures
- Glass transition temperatures
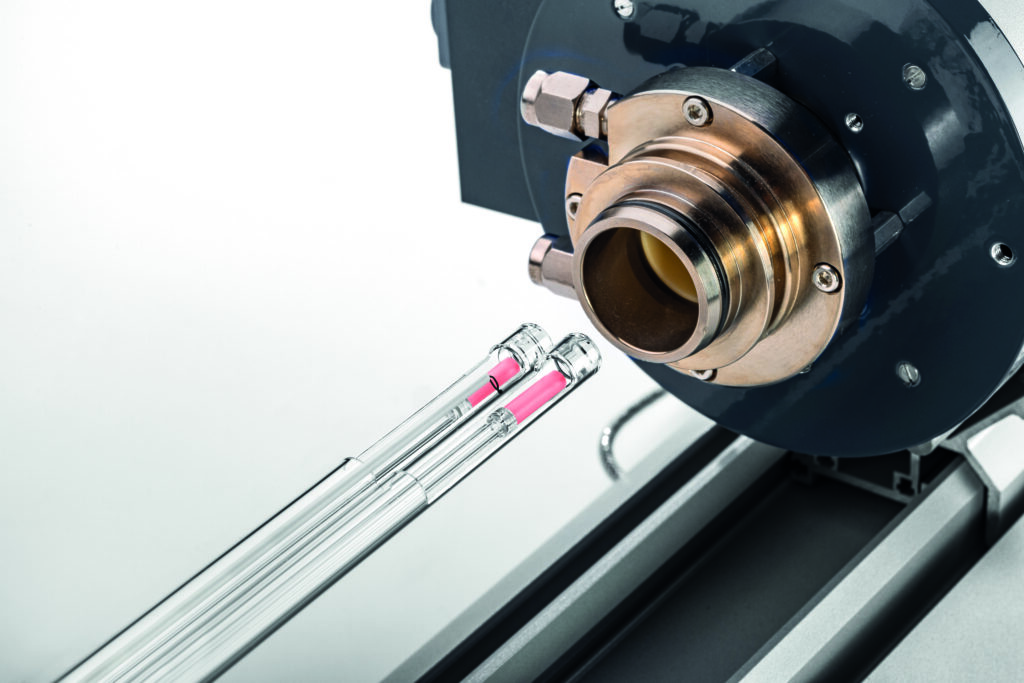
The cryogenic option of the DIL L75 Vertical enables measurements at temperatures from -263°C to +220°C, offers various sample holders, vacuum operation and controlled atmospheres and ensures maximum accuracy and easy handling.
Unique features
Highly vacuum-tight
Push rod dilatometer
Measurements under vacuum
and controlled
oxidizing or
reducing atmospheres
Highest accuracy and reproducibility
through high-resolution inductive
displacement transducer and thermostatting
Automatic pressure control for continuous
contact pressure between 10 and 1000 mN
Optional separation of mechanical and electrical components for use in “glovebox”
Friction-free "Zero Friction" design,
ideal for sintering studies
and ULE materials
Compact design with optional
turntable for additional ovens
Cryo option for measurements
at temperatures from -263°C to +220°C
Questions? Just give us a call!
+49 (0) 9287/880 0
Thursday from 8 am to 4 pm
and Friday from 8 am to 12 pm.
We are here for you!
Specifications
Black on white
MODEL | DIL L75 Vertical* |
|---|---|
| Temperature range: | -263 up to 2800°C |
| LVDT | |
| Measuring range: | +/- 2500 µm |
| Contact force: | 10 mN up to 1 N |
| Sample dimension: | Ø up to 20 mm up to 50 mm long and 20 mm wide** |
| Optical Encoder | |
| Delta L resolution: | 0,01 µm |
| Measuring range: | +/- 25000 µm |
| Automatic sample length detection: | yes |
| Force modulation: | yes |
| Contact force: | 10 mN up to 5N |
| Multiple furnace configuration: | up to 3 furnaces |
| Motorized furnace operation: | optional |
| Gas dosing: | manual gas dosing or mass flow controller 1,3 or more gases |
| Contact force adjustment: | included |
| Single/double dilatometer: | optional |
| Softening point detection: | included |
| Density determination: | included |
| L-DTA: | optional (up to 2000°C) |
| Rate controlled sintering (RCS): | included |
| Thermal library: | included |
| Electric thermostatization of measuring head: | included |
| Low temperature options: | LN2, Intracooler |
| Vacuum tight design: | yes |
| Automatic evacuation system: | optional |
| OGS oxygen getter system: | optional |
| *Specs depend on configurations ** Larger samples can be measured using a DIL L75 Macro, which can be customized to suit the sample. |
|
Oven program
DIL L75 Vertical
TEMPERATUR | TYP | HEIZELEMENT | ATMOSPHÄRE | TEMPERATURSENSOR |
|---|---|---|---|---|
| -263°C – 300°C | L75/264 He | Thermo coax | inert, oxid., red., vac. | Semiconductor / Pt 100 |
| -180°C – 500°C | L75/264 | Thermo coax | inert, oxid., red., vac. | Type K |
| -180°C – 700°C | L75/264/700 | Thermo coax | inert, oxid., red., vac. | Type K |
| -180°C up to 1000°C | L75/264/1000 | Thermo coax | inert, oxid., red., vac. | Type K |
| RT – 1000°C | L75/220 | Kanthal | inert, oxid., red., vac. | Type K |
| RT – 1400°C | L75/230 | Kanthal | inert, oxid., red., vac. | Type S |
| RT – 1600°C | L75/240 | SiC | inert, oxid., red., vac. | Type S |
| RT – 1650°C | L75/240 PT | Platinum | inert, oxid., vac. | Type S |
| RT – 1750°C | L75/240 M | MoSi2 | inert, oxid., red., vac. | Type B |
| RT – 2000°C | L75/260 | Graphit | N2/Vac. | Type C and/oder Pyrometer |
| RT – 2400°C | L75/270 | Graphit | N2/Vac. | Pyrometer |
| RT – 2800°C | L75/280 | Graphit | N2/Vac. | Pyrometer |
Accessories
- Devices for sample preparation
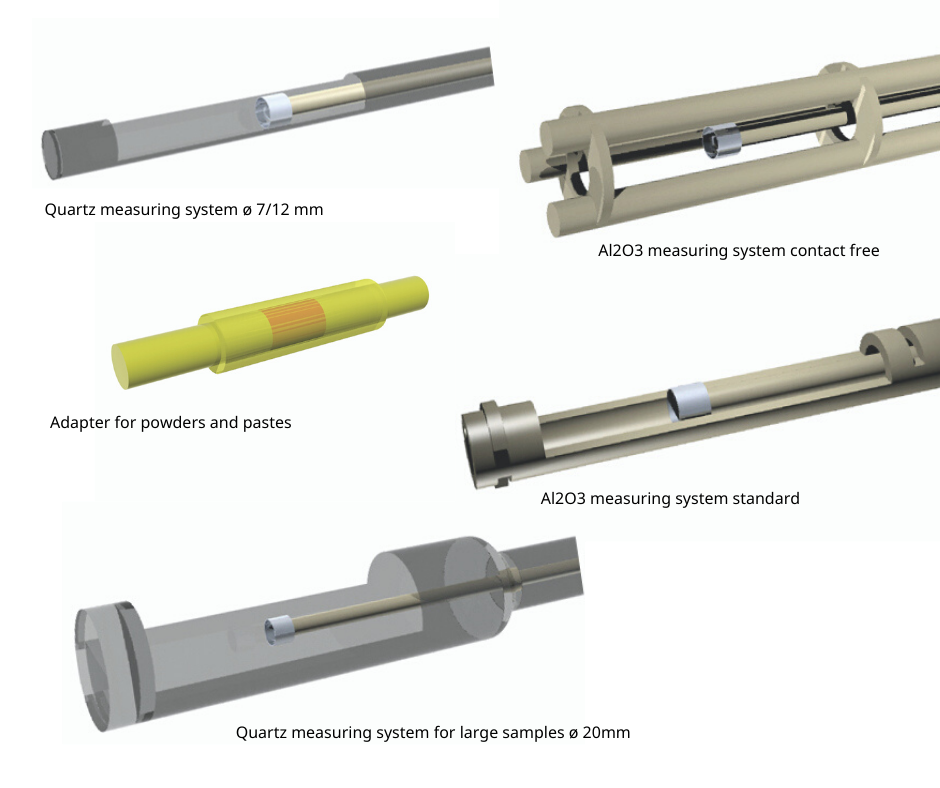
- Various sample holders (size, material)
- Caliper for manual or online entry of the sample length
- Turntable for up to 3 ovens
- Various gas boxes: manual, semi-automatic and MFC controlled
- Software option Rate Controlled Sintering (RCS)
- Various rotary and turbomolecular pumps
- Possibility of operation under 100% H2
- LN2 cooling
Software
Making values visible and comparable

- Glass transition and softening point determination
- Automatic softening point switch-off, freely adjustable (system protection)
- Display of absolute or relative shrinkage or expansion
- Representation and calculation of technical / physical expansion coefficients
- Rate-controlled sintering (software option)
- Sintering process evaluation
- Density determination
- Automatic evaluation routines
- System correction (temperature, zero curve, etc.)
- Automatic zero point adjustment
- Automatic punch contact pressure control
- Real-time color display
- Automatic and manual scaling
- Display of the axes freely selectable (e.g. temperature (x-axis) against delta L (y-axis))
- Mathematical calculations (e.g. first and second derivatives)
- Saving complete evaluations
- Multitasking function
- Multi-user function
- Zoom option for various curve sections
- Any number of curves can be loaded on top of each other for comparison
- Online Help Menu
- Free labeling
- EXCEL® and ASCII export of measurement data
- Data smoothing
- Zero curves are offset
- Cursor function
- Statistical curve evaluation (mean value curve with confidence interval)
- Tabular printout of the data and expansion coefficients
- Calculation of Alpha Phys, Alpha Tech, relative expansion L/L0
- Curve arithmetic, addition, subtraction, multiplication
Application
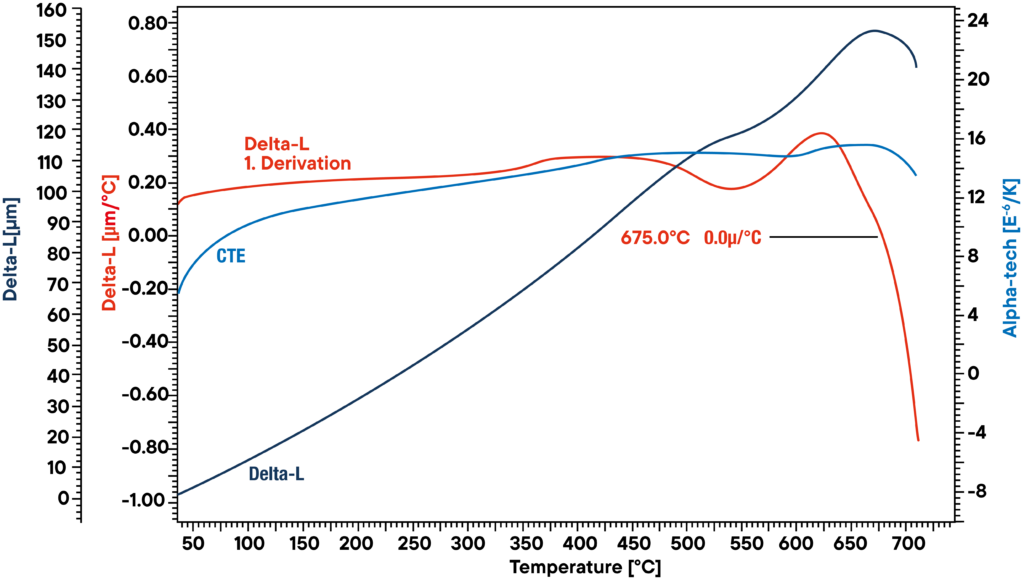
Application example: Glass ceramic
Dilatometry is an excellent method for determining the coefficient of thermal expansion (CTE) and the softening point of glass-ceramics. In addition to the absolute expansion, the relative expansion and the coefficient of thermal expansion (CTE), the first derivative of the absolute expansion can also be calculated against the temperature. The O-passage of the differentiation is the maximum of the thermal expansion and therefore the softening point of the material can be calculated exactly.
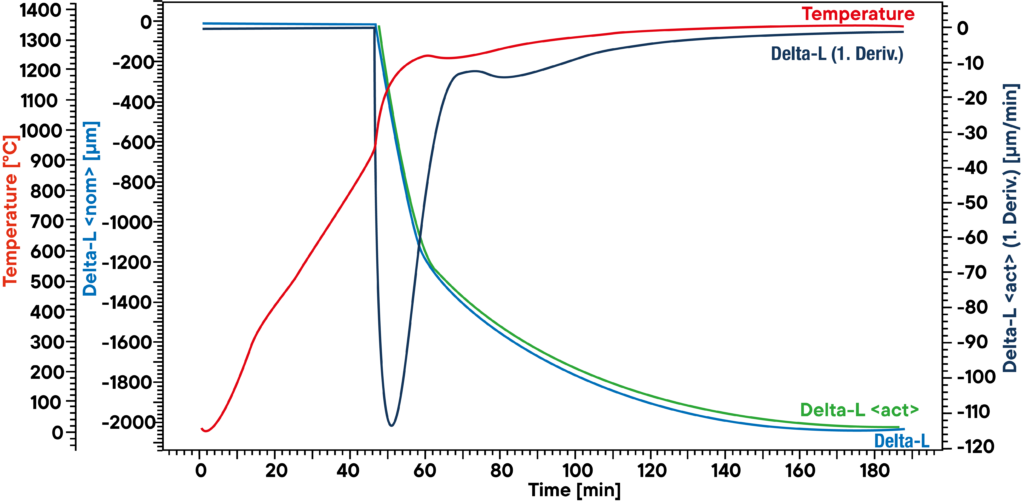
Application example: DTA measurement using a quartz sample
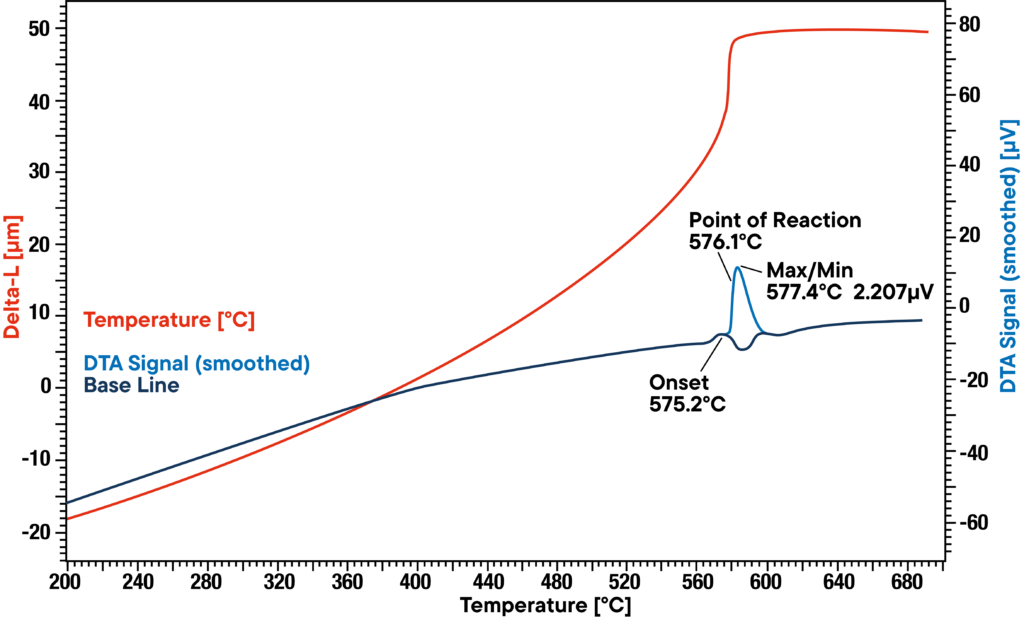
With the DIL L75 dilatometer and the DTA evaluation add-on, a DTA measurement with simultaneous temperature calibration can be carried out on a crystalline (SiO2) sample. During a linear heating phase of the sample, the control behavior is changed by the endothermic and exothermic reactions and corrected by the software program. A DTA curve is generated from these changes. Since, according to the literature, this transformation takes place at 574°C for SiO2, the calibration can be checked using the DTA peak.
Well informed
